Do you get confused when looking at the variety of rough-in dimensions that come with a toilet?
When purchasing a new toilet, it is essential to measure the rough-in of the toilet so you know which toilet will be best suited to your bathroom. If you’re not experienced in plumbing, you might not have even heard about rough-in dimensions.
We’re here to enlighten you about each and every rough-in dimension, how to measure them, and how to figure out which rough-in dimension is the best for your toilet according to your bathroom’s space.
What Is a Rough-In?
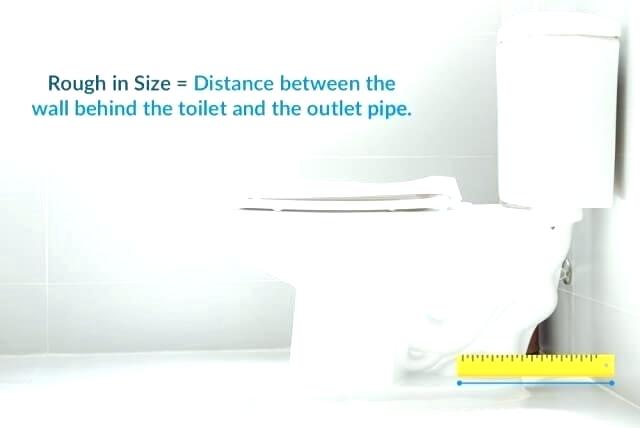
A rough-in refers to the distance between the wall at the back of the toilet and the center of the toilet flange. The center of the toilet flange aligns with the middle of the toilet bolts that hold the toilet bowl in place. Toilet rough-ins are usually the following measurements:
- 10 inches
- 12 inches
- 14 inches
12-inch rough-in toilets are the most commonly found.
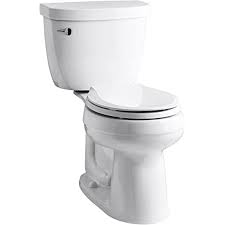
10-Inch Rough-In
You can easily gain a few inches of space in your bathroom by investing in a toilet with a rough-in size of 10 inches. This is the most cost-effective and inexpensive solution to make space in your bathroom since the toilet sits closer to the wall and adds a little more space in front of it.
These toilets are very advantageous for powder rooms and bathrooms with limited space. Some of the top toilets in this category are the KOHLER K-3851-0 Cimarron, the American Standard Colony two-piece, and the Toto Drake Washlet.
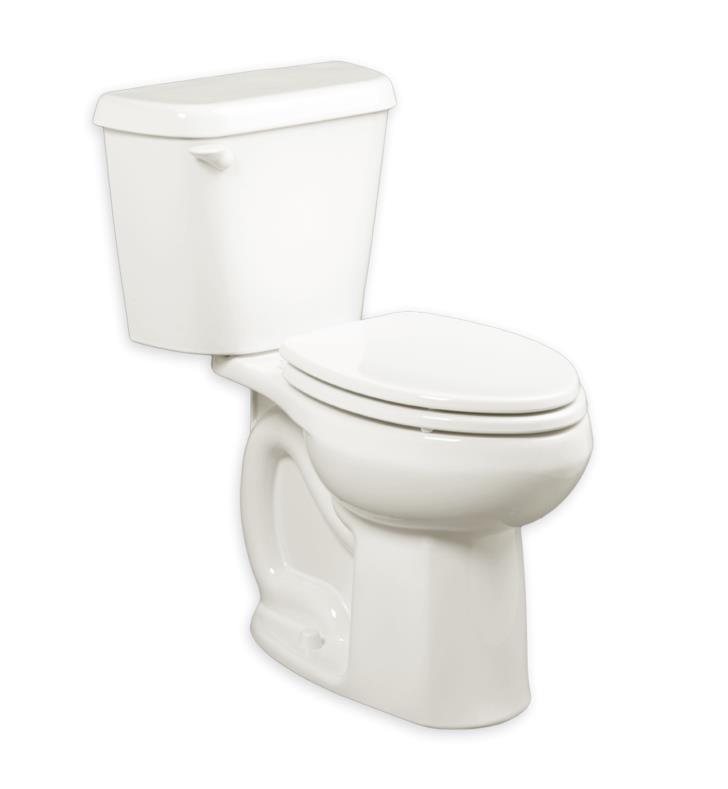
12-Inch Rough-In
A rough-in size of 12 inches is the standard measurement in the toilet industry because they’re the most commonly used toilets within households. They provide less space than a 10-inch, but comparatively, they are much cheaper. Some of the best toilets in this category include the Kohler K-3654-47 Persuade, the Toto CST744SL, and the Sterling 403080-96 Windham.
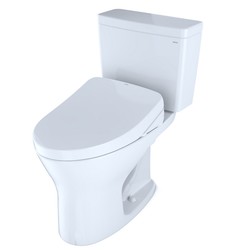
14-Inch Rough-In
Sometimes you need to lengthen the space behind the tank of a toilet. This is where a 14-inch toilet provides the best optimization. You can easily buy a 12-incher at a retailer, but 14 and 10-inch rough-in toilets have to be specially ordered, as there aren’t usually a lot of options to choose from in-store. Some examples are the Kohler K-3949-0 Highline, the Sterling 402078-0 Windham, and the Kohler K-3947-0 Wellworth.
What Tools Do You Need To Take the Measurements?
You can easily measure the rough-in of a toilet using a measuring tape with a metal hook at the end. You can get a measuring tape for just $1 to $5. Make sure the tape has standard units of measurement that you can understand.
Why Is Rough-In Important?
Before buying a new toilet, it is essential to measure the rough-in of the toilet so that the bathroom can accommodate the toilet space. You don’t want to end up with a toilet that can’t fit in your bathroom. If your bathroom space is very limited, a 10-inch rough-in toilet comes in handy.
What You Need To Know To Get Started
Before buying a toilet, do some research and look for toilets that will provide accessibility and align with the four dimensions and measurements you need to properly adjust a toilet in the bathroom space.
The Distance of Toilet Flange from Back Wall–
The first step is to set the middle of the water closet flange 12 inches, 10 inches, or 14 inches from the flange according to the space of the bathroom. Do not measure it from the base molding! Measure it from the wall.
The information about the rough-in can be found on the toilet’s specification sheet that provides you with all of the information about every feature of the toilet.
Also, if you’re taking the measurement from a stud wall, add the thickness of the stud wall too. For example, if the wall is 0.5 inches thick, the flange center should be 12.5 (10.5 or 14.5) inches away from the wall.
If you’re just replacing your toilet and see that the center of the closet flange is only 10 inches away from the wall, just buy a 10-inch rough-in water closet.
The same can be applied to closet flanges that are 12 or 14 inches away from the wall.
Necessary Clearance on Left and Right-
The minimum measurement for this dimension is 15 inches. You can have much more according to the space in your bathroom. So, when you’re looking for the new toilet, make sure that there is at least 15 inches of space from the center of the flange to any nearing fixture (like a sink wall) on both the left and right. Again, if you’re measuring the clearance next to a stud wall, add the thickness of the wall with it.
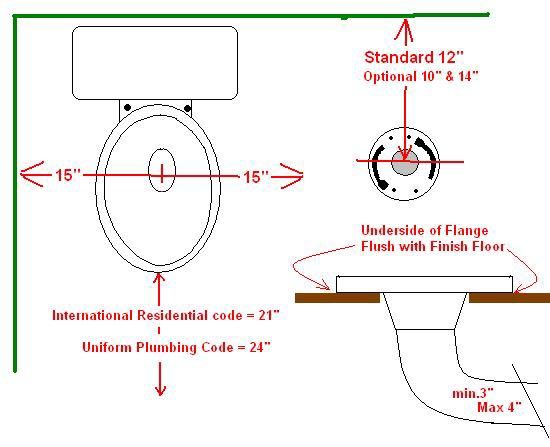
Free Space Needed in Front of Bowl-
The clearance needed in front of the toilet bowl depends on your local plumbing codes.
If your local plumbing code is under the International Plumbing Code (IPC), you’ll need to have at least 21 inches of clearance.
If your local requirement is under the Uniform Plumbing Code (UPC), you’ll need at least 24 inches of clearance in front of the toilet.
Where To Place Cold Water Supply Line–
From the center of the water closet flange, measure 6 inches to the left side and then measure 7 inches from the above like an inverted “L”. This height aligns with most base moldings and doesn’t cause a need to trim the waterline.
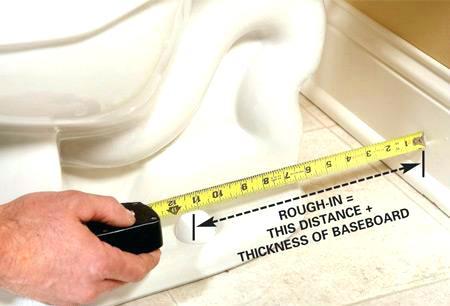
How To Measure the Rough-In on a Standard Toilet
Most standard toilets have a toilet rough-in of 12-inches. But some toilets require 10 or 14 inches of space from the wall to the center of the toilet flange.
When you’re measuring, measure the rough-in from the finished wall and not from the baseboard or base moldings. If you already have a toilet in place and can’t see the toilet drain, measure the dimensions from the wall and pull the tape to the center of the toilet base bolts.

How To Measure the Rough-In on a Corner Toilet
A corner toilet is different from a standard toilet. It occupies the space in the corner of the bathroom and makes the measuring a little different.
First, mark the locations from both corners of the toilet by extending the measuring tape from both corners to the center of the bolt caps.
Second, use a straight edge tool to draw perpendiculars from both locations. The place where both the perpendiculars intersect each other will be the toilet rough-in location.
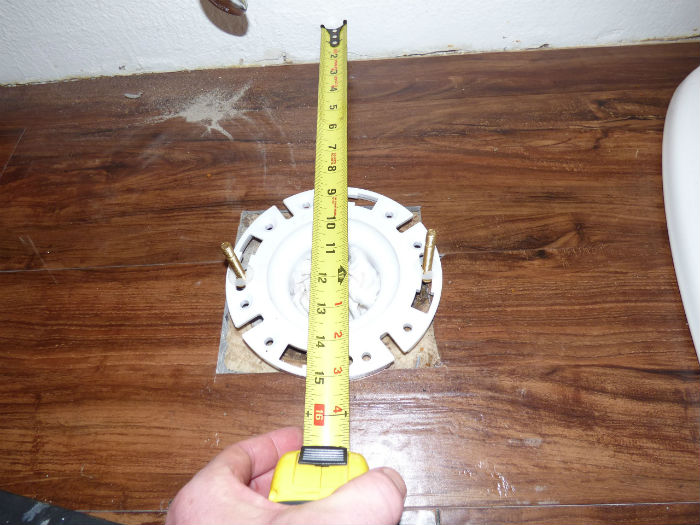
How To Measure the Rough-In on a Rear Outlet Toilet

Rear-outlet toilets operate differently from other toilets.
Here, the waste doesn’t exit through the floor drain, it passes through the wall in the bathroom. To measure the rough-in of a rear outlet toilet, you’ll have to measure the distance between the finished floor and the center of the waste drain.
The Bottom Line
Determining the rough-in distance of your toilet should be one of the first steps of installing a new toilet. If you follow the above guidelines carefully, your work will always be easy when installing a new toilet. You can even do this without the help of a plumber since most toilets come with clear instructions on how to install.
So, there you have it. We’ve provided you with a guide that has all the information you’ll need before buying a toilet, including the various dimensions that are needed for installation. Refer to this guide and measure away!
How do you measure the distance in front of the toilet when you have an angled wall in front of toilet? By angled wall I mean farther away from toilet on right and gets closer as you move to the left.
Is it just 21 inches on a line from front edge at center of toilet and perpendicular to that front edge, or is it 21 inches anywhere from that front center edge? On our angled wall, it is just over 21 inches at center and perpendicular. However, it is less than 21 inches to points down the wall as you move to the left across the angled wall.